How To Apply Thermal Paste To CPU and GPU – step-by-step application
A simple step-by-step guide on how to apply thermal paste correctly to your CPU and GPU
Share this article...

WePC is reader-supported. When you buy through links on our site, we may earn an affiliate commission. Prices subject to change. Learn more
If you want to know how to correctly apply thermal paste to your CPU or GPU, then you’re obviously in the right place. If you’re unsure about using thermal paste, you don’t need to worry too much – it’s really simple. Thermal paste is a crucial component commonly used to protect your CPU from heat and, of course, your Intel or AMD investment from going up in smoke. Applying thermal paste to your CPU is obviously an important step to help you’re keep your processor cool, but we’re also going to cover the use of thermal paste for your GPU too.
With this in mind, knowing how to correctly apply the thermal paste is important, but so is buying the best thermal paste. Chances are, you have stumbled upon quite a few different methods to apply thermal paste to your CPU or GPU, leaving you a little confused. Don’t worry; as long as you apply the correct amount, your CPU temperatures will be fine.
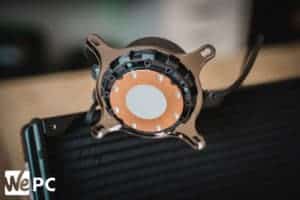
How to correctly apply thermal paste to CPU
There’s more than one way to apply your thermal paste or thermal paste substitute. And, you might be surprised to hear that a lot of those methods all work the same, so you don’t need to get bogged down trying to find the “best method for applying thermal paste”. From a small dot the size of a pea (otherwise called the dot method) in the center of the CPU to a cross, let’s take a look at what difference these methods make on your PC build’s temperature.

Before you re-apply the thermal paste on your CPU, you should get rid of the old thermal paste from the ends of both the processor and the heatsink. Don’t worry, though; it’s quite simple.
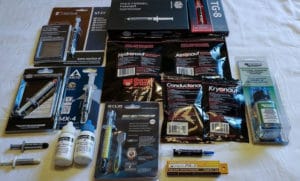
You’ll need:
- Microfiber / Lint-free cloth or cotton swab
- Isopropyl Alcohol
- Replacement Thermal Compound
- Screwdriver
Also, make sure you have your new or existing CPU cooler ready to install. You’ll likely need a small screwdriver to remove the screws holding down the cooling system. If you realise you’re in need of an upgrade, check out our best CPU coolers in 2024.
Step
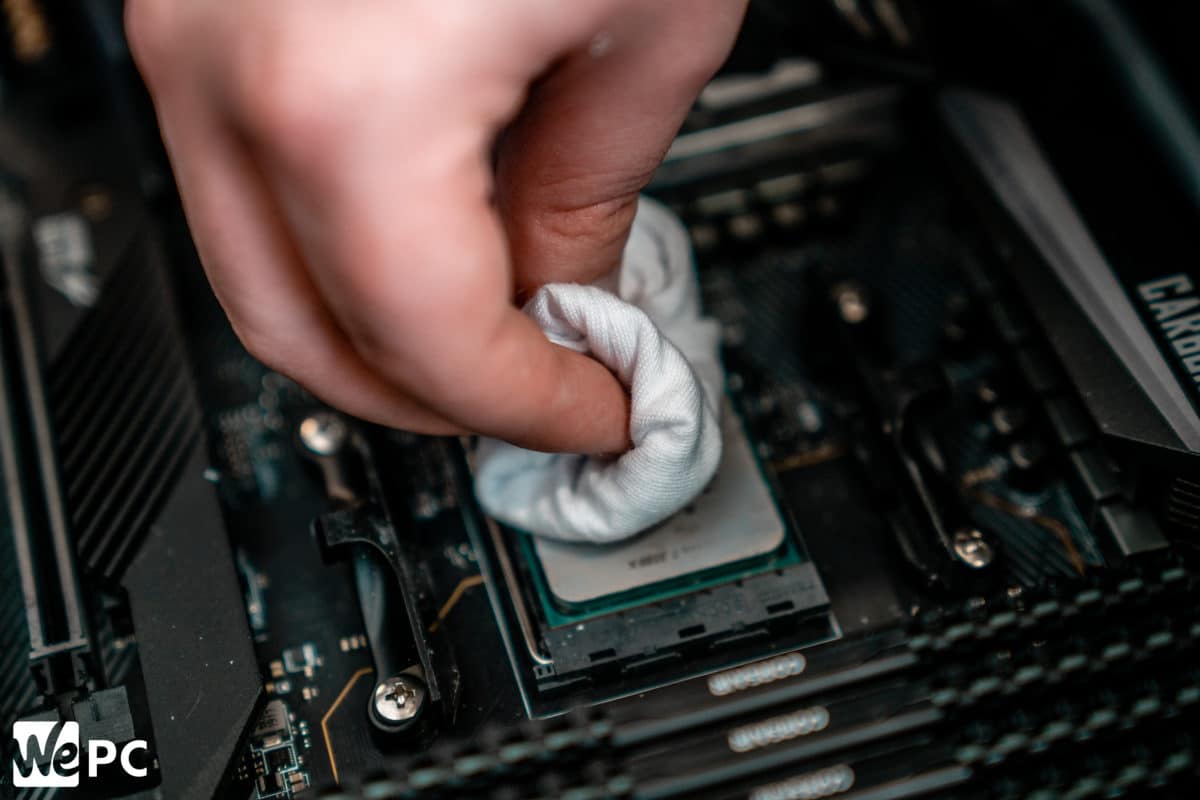
Remove the first layer of thermal paste
Use the lint-free cloth to get rid of the first layer of thermal paste and apply the cloth or the microfiber with isopropyl alcohol to get rid of the remaining thermal paste on the chip.
Step
Make sure you remove all remaining thermal paste
Continue doing the previous step until you get rid of all the thermal paste on the chip.
Step
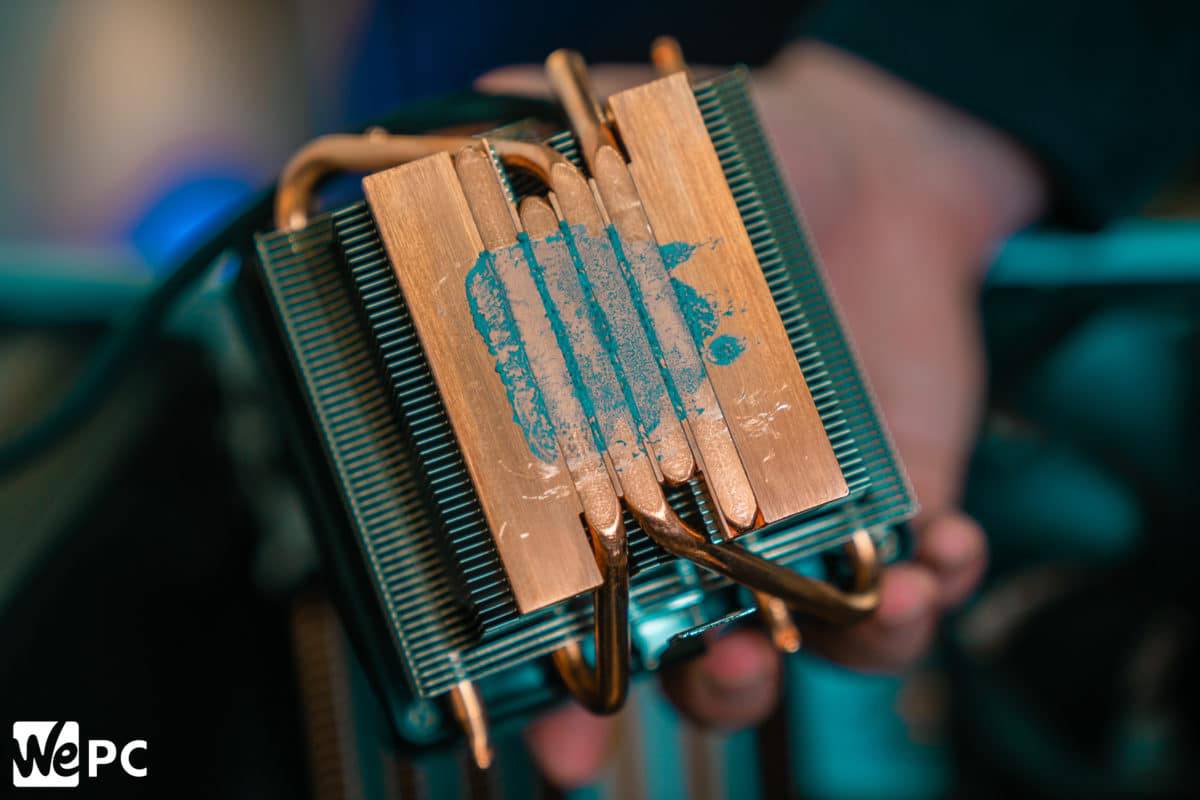
Remove any thermal paste from the heat sink
Again, you need to make sure any previous thermal paste leftovers are gone. Don’t forget to do this on the heat sink’s end as well.
Step
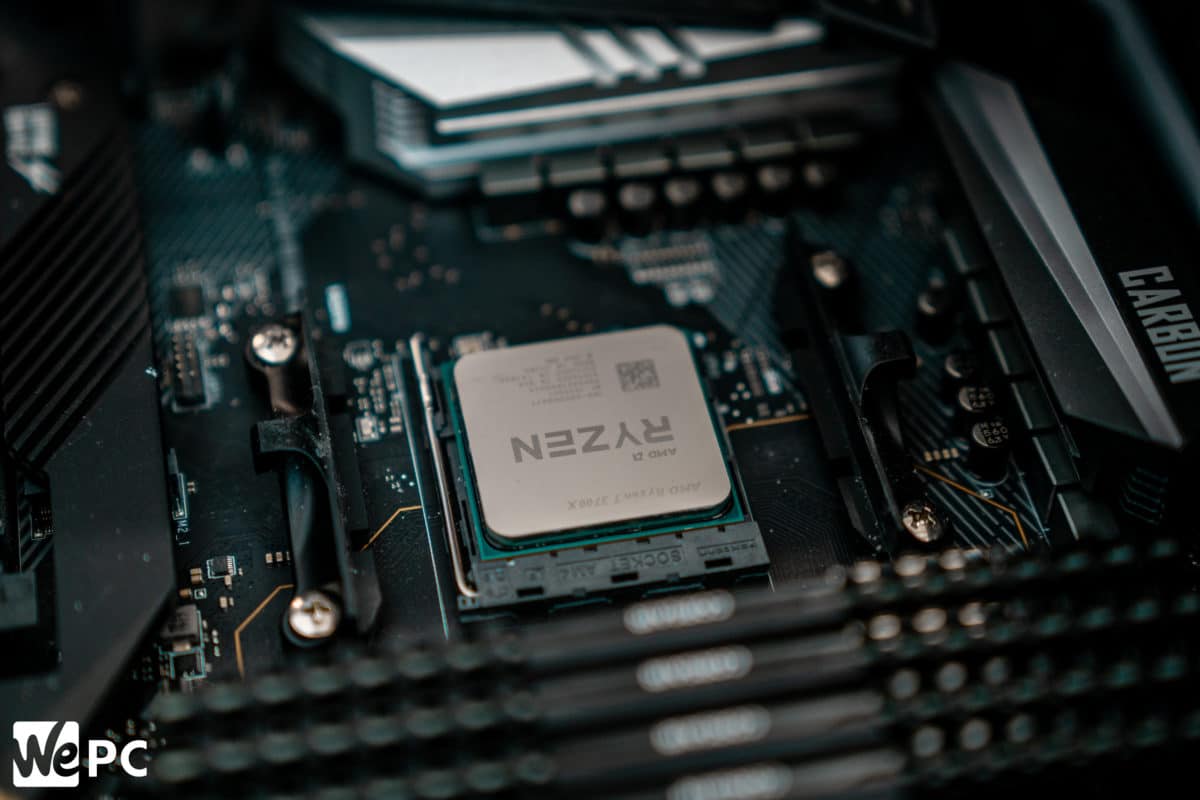
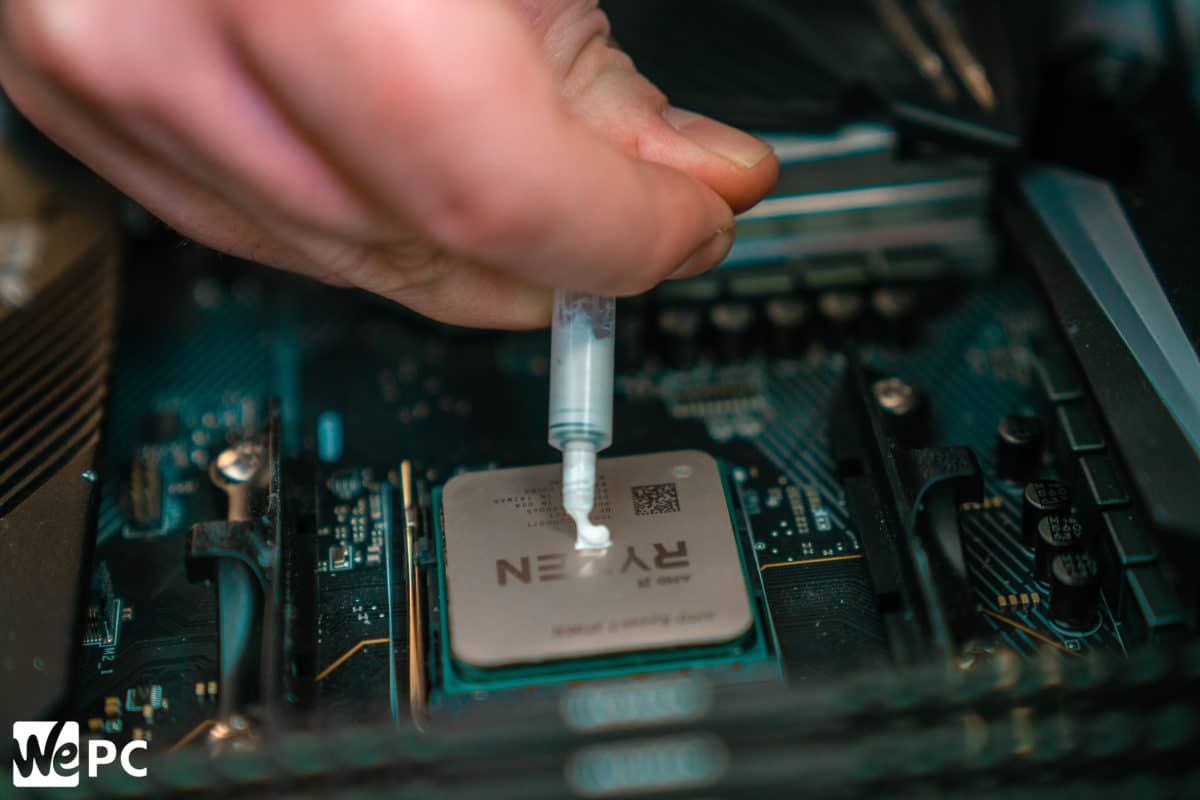
Carefully apply the thermal paste
Carefully apply a dot of the replacement thermal paste on the CPU when the chip is cleaned and the alcohol has dried.
Step
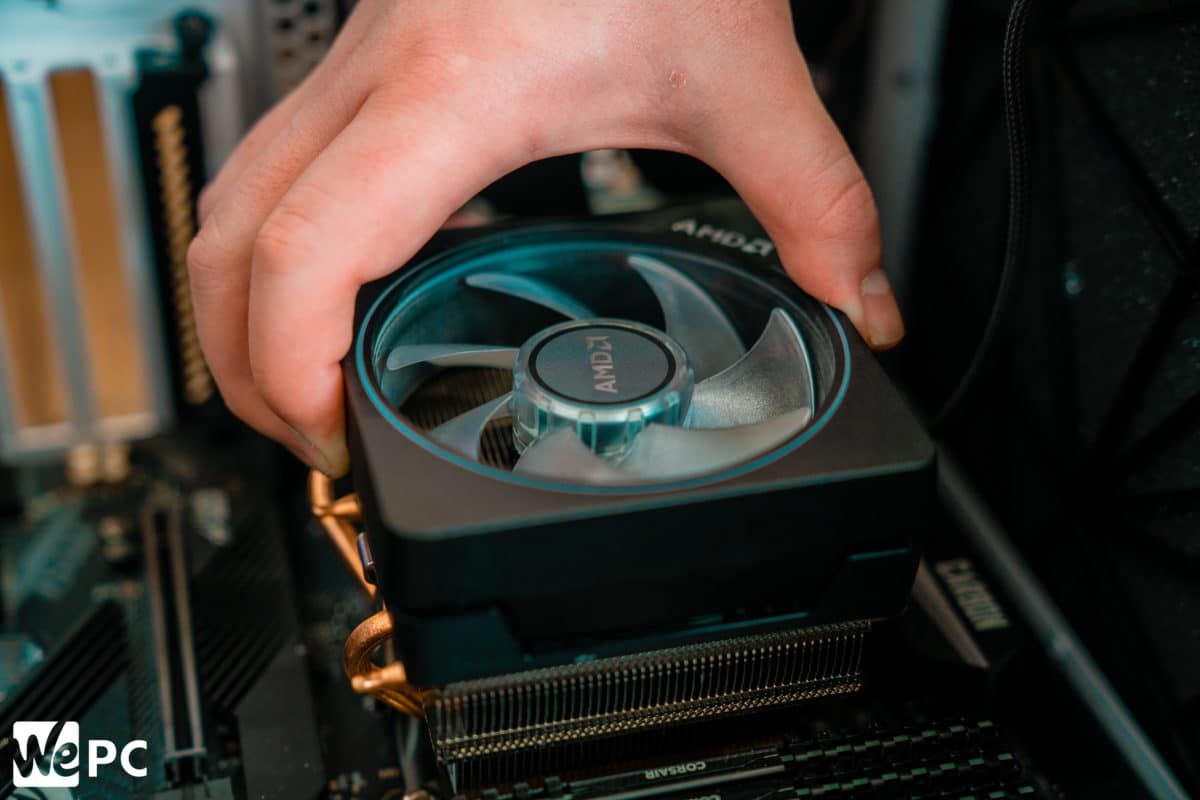
Place the heat sink back on the CPU
Make sure you carefully place the heat sink back on the CPU after the paste is applied.
Don’t bother spreading out the paste at all as this should spread throughout evenly when you place the heat sink back on the CPU.
Step
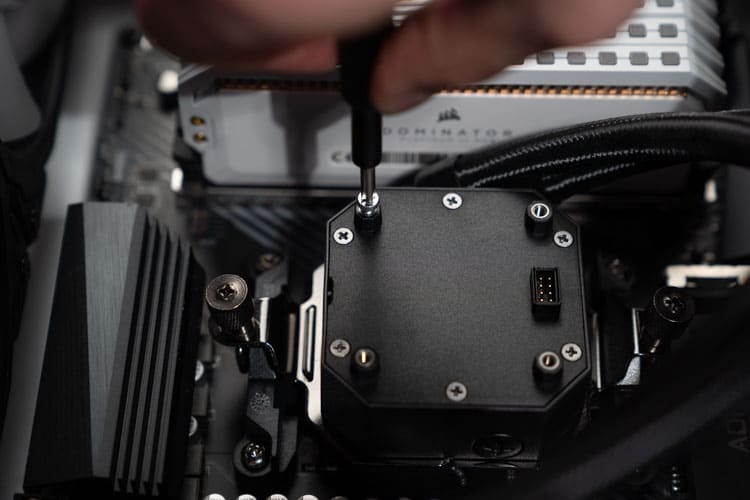
Tighten the screws
Finally, you’ll want to secure your heat sink / CPU fan back in place in it’s rightful place. Simply tighten the screws.
Once everything is secured, you can set everything back and you should see improved temperatures, even in extreme gaming.
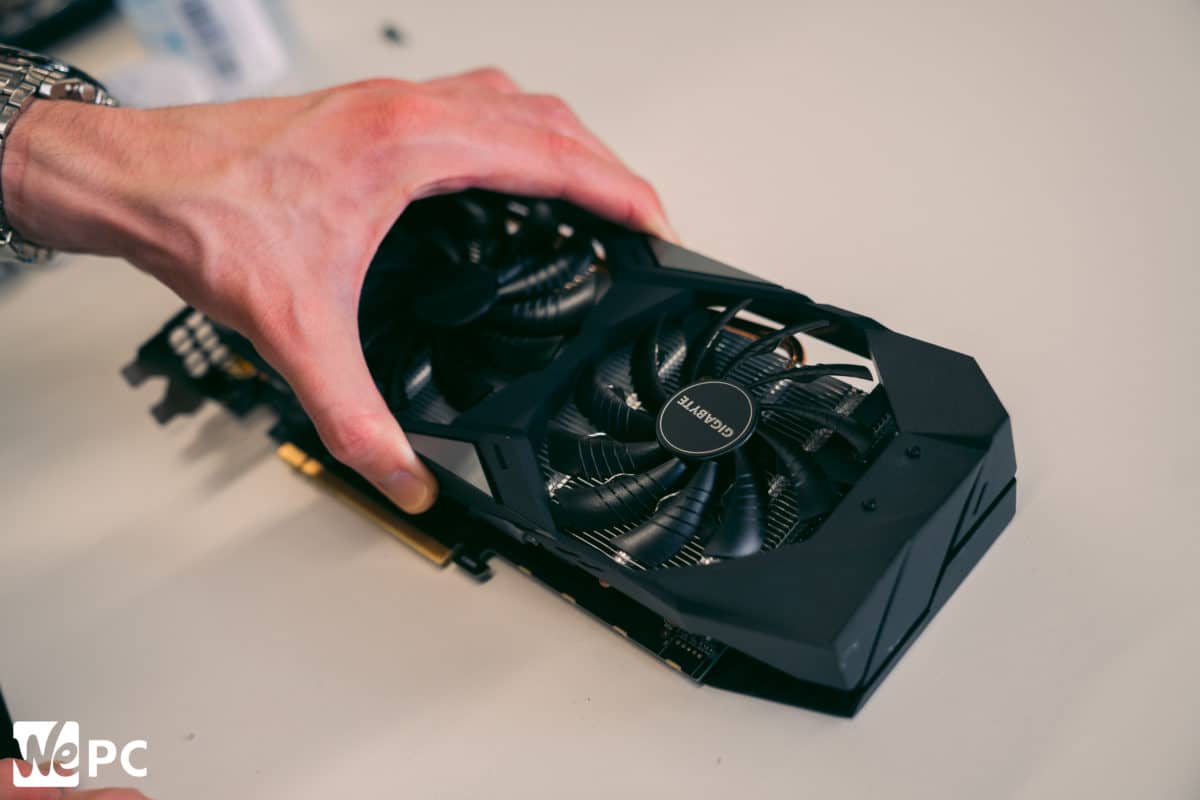
How to correctly apply thermal paste to GPU
You also need to get rid of the old thermal paste from your GPU, similarly to how we did with the CPU. You’ll need all the same equipment, with the addition of a screwdriver.
What you need:
- Microfiber / Lint-free cloth or cotton swab
- Isopropyl Alcohol
- Replacement Thermal Compound
- Screwdriver (to remove the screws)
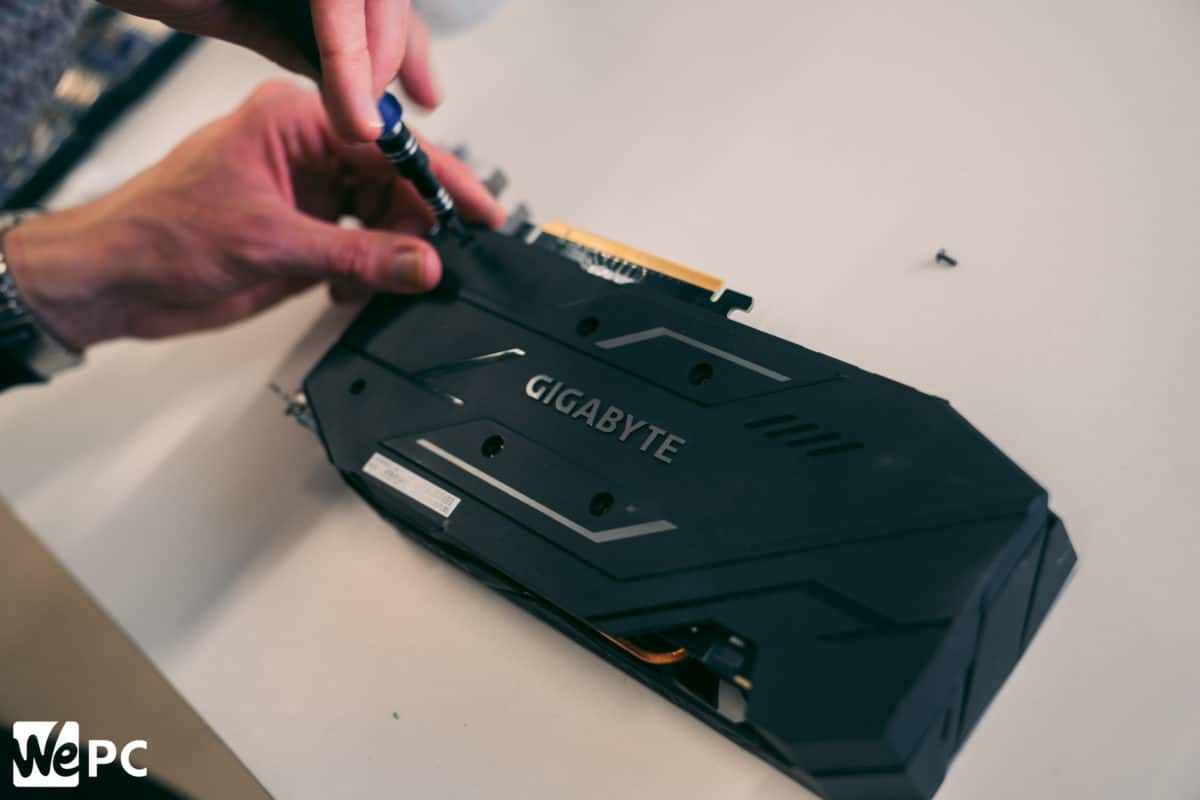
Step
Unscrew graphics card
Make sure you unscrew all of the screws from the graphics card.
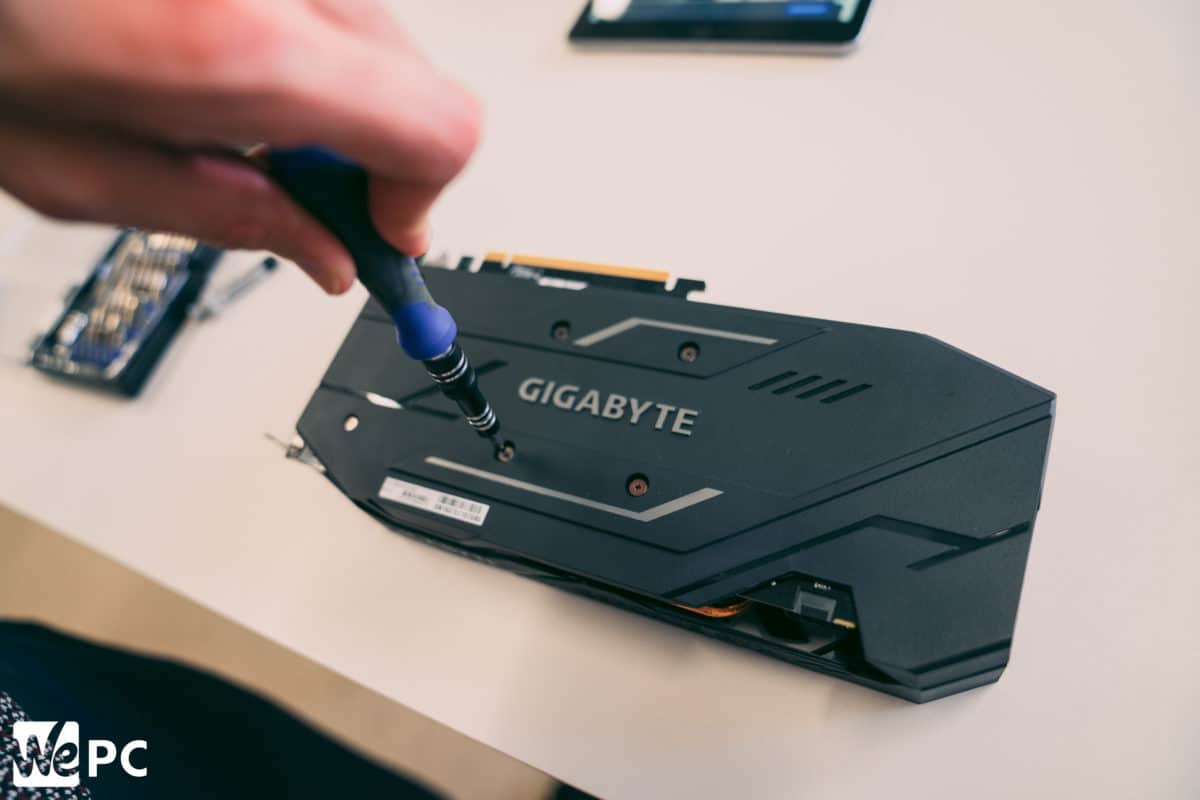
There are some graphics cards that have screws both on the top and bottom and even on the sides. Make sure you have them removed prior to removing the cover. You can tell whether or not everything is removed if it comes off easily. DO NOT apply too much pressure as it could cause damage to the card.
Step
Watch out for fan power plugs
Don’t forget to keep an eye on the fan power plugs as they usually are fragile.
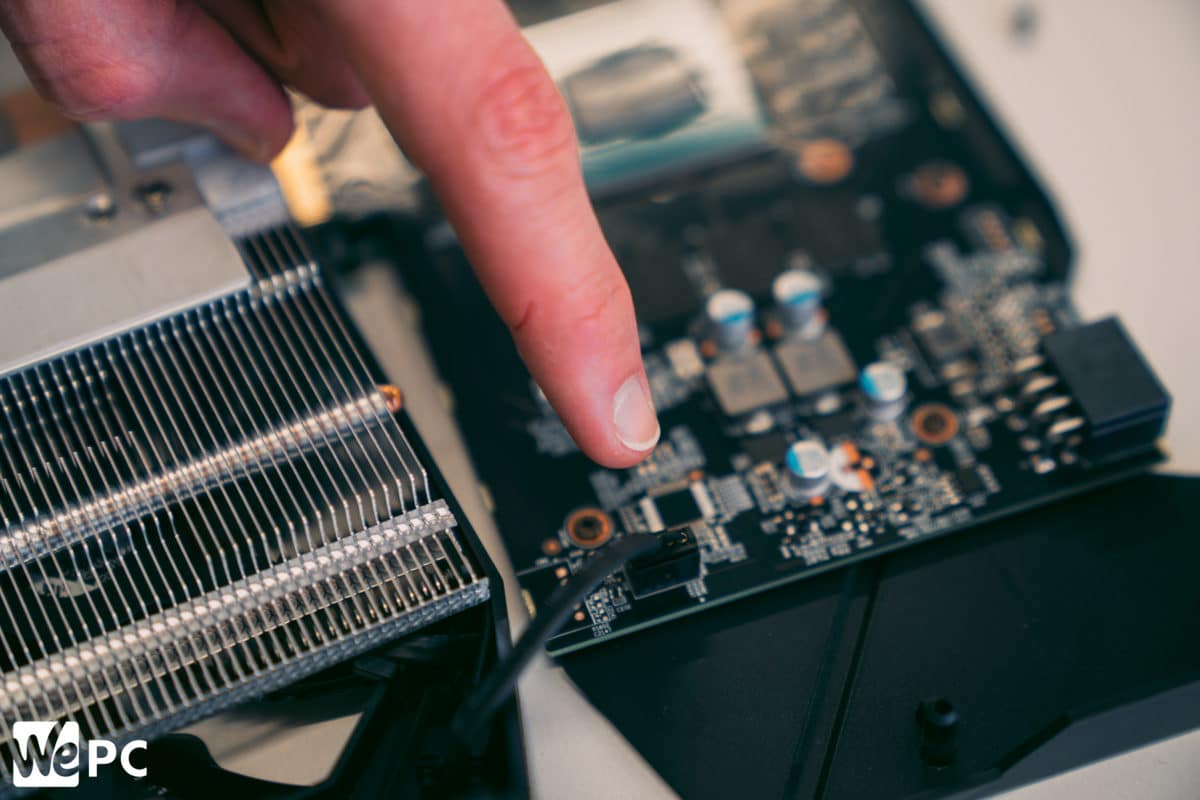
If your GPU has thermal pads, it is best to leave them be unless your intention is to replace them with pads with the same dimensions in thickness.
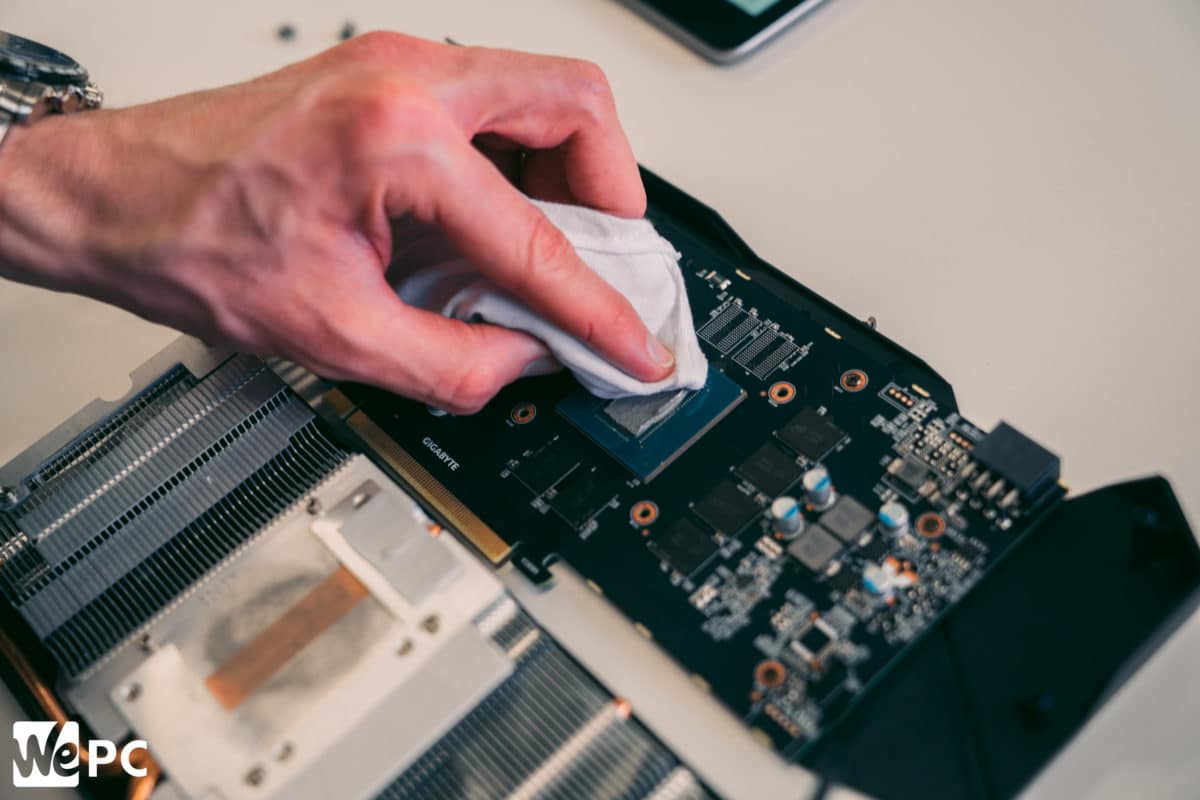
Step
Clean the base and GPU fan
When everything is removed and screws set aside, use the microfiber cloth with the isopropyl alcohol and clean both the GPU fan and the base of the GPU.
Step
Apply the thermal paste
Apply the thermal paste to the chip just as we did with the CPU.
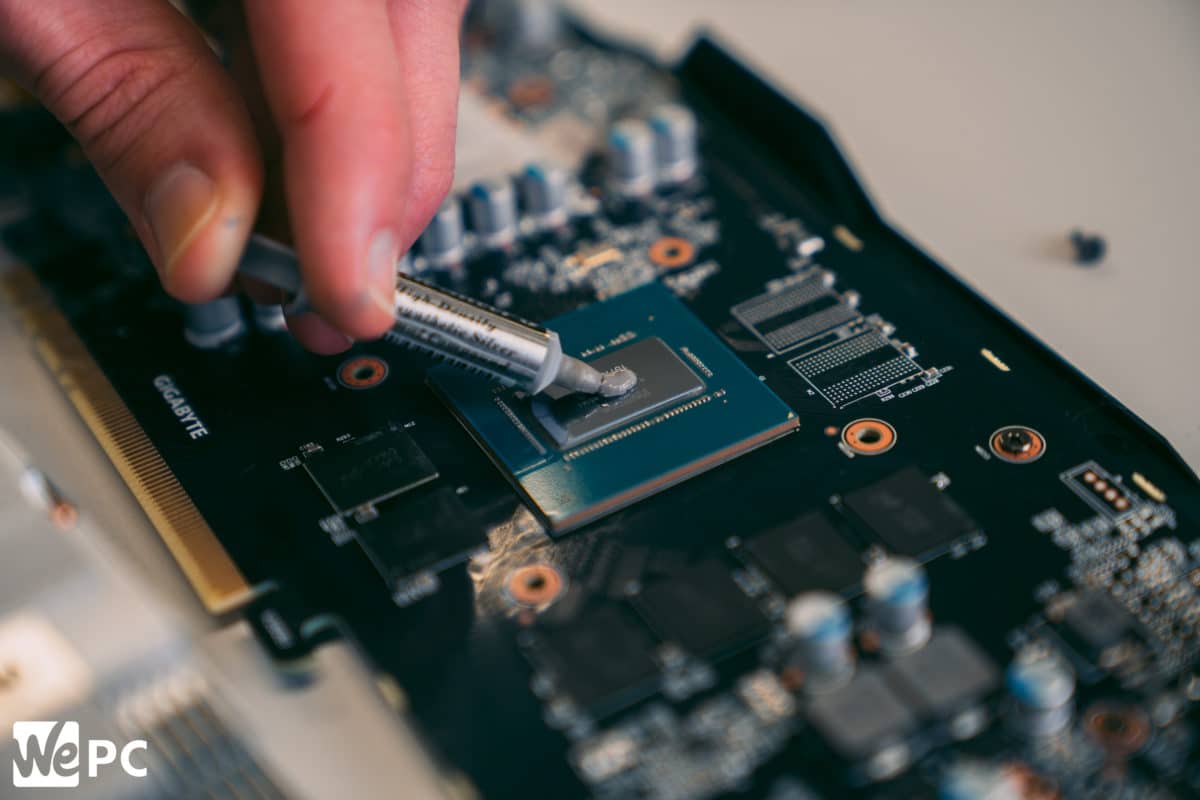
Leave it as it is and don’t spread it out as the heat sink should do the job and spread the paste evenly for you.
Step
Place the cover back on the GPU
Carefully refit the cover of the graphics card.
Step
Fit the screws back into place
Tighten the screws back in a cross pattern to make sure everything is fitted and tightened correctly.
Once finished, install the GPU back onto the motherboard and you should see better performance in temperatures, even when loaded.
How to correctly apply thermal paste to CPU or GPU : FAQs
How to correctly apply thermal paste to CPU or GPU?
Although certain thermal pastes may be marketed as CPU or GPU pastes exclusively, it’s all actually the same stuff.
The truth is, there’s just no need for the paste to differ in any way. It’s doing the exact same job no matter which bit of hardware you’re applying it to.
It forms a thermally conductive bridge between the baseplate of your CPU and GPU in order to maximize heat transfer between the unit and its cooling system.
So, if you’ve got some CPU thermal paste going spare, and you think your GPU could do with sprucing up in that department, feel free to do so.
As long as you remove the old paste safely, then apply the new layer correctly, it should knock at least a few degrees off your GPU’s running temperature — hurray!
However, it’s important to bear in mind that while no thermal compounds are made for a single bit of hardware, there are different types available.
Should thermal paste cover the entire CPU?
Ideally, the thermal paste will coat the entirety of the contact area between your CPU and the cooler, or at least where the copper heat pipes connect with the baseplate.
However, that doesn’t mean you have to physically spread the thermal compound across the whole of your CPU like you’re buttering a piece of toast. A small pea-sized dot in the middle of your CPU is fine, as you’ll then compress it with your cooler’s contact plate, spreading it automatically.
This method of using the cooler to spread the thermal paste is actually seen as superior to manually spreading the compound, as it’s the best way to ensure there are no gaps between the paste and the contact plate of your cooler.
When you attempt to spread the paste manually, it’s impossible to get it perfectly even, which means there’ll be tiny gaps between the cooler plate and your CPU, reducing heat dissipation.
How much thermal paste do I need for CPU and GPU?
Some describe the amount of thermal paste you need for your CPU as roughly the size of two grains of rice, but we think pea-sized is a much better guide, as a pea is much easier to visualize.
There are many ways to apply thermal paste, but as long as the total volume of the paste used adds up to the size of that single garden pea, everything should be fine.
We’ve found that application style has very little effect on the efficacy of the thermal paste, but we do warn against manually spreading the paste out over the base of your CPU. It’s much better to let your cooler’s contact plate squeeze the paste across the surface of your CPU base when you refit it.
When it comes to applying a fresh layer of thermal paste on your GPU, you can follow the exact same protocol. A pea-sized blob in the center of the baseplate is all you’ll need.
How long does thermal paste last?
Most manufacturers claim that their thermal paste has a lifespan stretching between three and five years; however, these figures are calculated with the assumption that the paste is being held in optimal conditions. This may not be the case with your build.
For CPUs, a good rule of thumb is to replace the thermal paste once annually, just to ensure it’s performing at the peak of its potential. Although, there are a couple of instances that call for a slight deviation from the yearly schedule.
For example, if you’re replacing your CPU cooler, or even if you’re just removing your current one to do some inspections, you’ll need to replace the thermal paste before refitting.
GPUs don’t require anywhere near as much maintenance in the thermal paste department. They tend to run for 5-10 years before it’ll need replacing, at which point you may be due an upgrade anyway.
Is it worth replacing GPU thermal paste?
As we’ve just mentioned, GPUs can run an exceedingly long time before you’ll need to replace the thermal paste, which is fantastic.
The reason being, graphics cards are a little trickier to disassemble, so it would be a nightmare if we had to constantly open them up to reach the GPU baseplate. What’s more, there are plenty of fragile components within a graphics card, such as fan power plugs, and our persistent meddling would eventually cause damage of some kind.
That said, there are some instances when replacing your GPUs thermal paste is definitely worthwhile.
If you’ve noticed a steady increase in your GPU’s thermals for seemingly no reason, there’s a good chance there’s an issue with the current thermal paste. If you’ve been using it for over five years, it may have dried up and cracked, causing rifts between the heat spreader and the GPU baseplate. Unless you’re planning on upgrading your GPU, this scenario calls for some new thermal paste.
Is too much thermal paste bad?
From a performance perspective, applying too much thermal paste isn’t really an issue. As long as it’s evenly spread beneath the contact plate of the cooler, it should get the job done the same as if you’d applied the perfect pea-sized amount.
However, you certainly don’t want to be dealing with a bunch of excess paste if you can avoid it. If you’ve applied far too much thermal paste, once you refit the cooler, the excess will be squeezed out over the edges of the CPU or GPU baseplate.
If you’re using a non-conductive thermal paste, your biggest worry is making a mess of your expensive hardware. On the other hand, if you’re using a high-performance conductive paste, there’s a chance that spilling some over the edges of your baseplate may cause it to short nearby components, which can cause irreversible damage to your GPU.
For these reasons, it’s best to be as accurate with your application as possible.
Can I use toothpaste as thermal paste?
Technically speaking, certain toothpastes can be used as thermal pastes. It all depends on their thermal conductivity. Although, even toothpaste with high thermal conductivity will dry out within a week.
Some counteract toothpaste’s fast-drying properties by mixing it with Vaseline, but even then, it will need to be changed every 30 days or so.
Here at WePC – and I can’t stress this enough – we can’t recommend using toothpaste on your expensive computer hardware, with Vaseline or not. Being that thermal paste rarely ever costs all that much, you’re much better off buying a specialist compound and saving your toothpaste for your pearly whites.
Not only will it be difficult to source a toothpaste that exhibits good adhesion to metal, high thermal conductivity, and has a long shelf life, it’s never going to be optimized for use as thermal paste.
Please, please, please just treat yourself to some official thermal paste. Your computer will thank you!
Can I buy thermal paste at Walmart?
Walmart sells everything, thermal paste included, but as we’re talking about a store in which you can buy your tires and your groceries under one roof, that shouldn’t really surprise anyone.
And it’s not like they sell some poor quality, no-name-brand, budget pastes either; they have a wide range of quality thermal pastes from industry-leading brands such as Corsair, Arctic, and Noctua.
Walmart’s available thermal pastes range from around $5 to $25, and you can purchase them online, so you don’t even have to stop gaming to go and fetch some — perfect!
It’s not just thermal paste that Walmart stocks their shelves with. Within their 15-page computer thermals inventory, you can find such classic bits of gear as the Noctua NH-D15 and MSI Torx fans.
As is always the case with Walmart, the pricing on these products is very reasonable, but we find you can source them cheaper from sites such as Amazon.
Final word
There are many ways in which you can apply thermal paste to your CPU and GPU. You’ll also want to make sure that you know the difference between thermal grease vs. thermal paste before getting started.
If you follow the steps and advice above, then you’ll be able to feel confident that not only are you correctly applying your thermal paste, you’ll also see improvements in your PC build’s performance. Don’t forget to check our best thermal paste review to make sure you’re getting the best product for your build as well! If you have any questions on how to apply thermal paste, which thermal paste to buy, or anything else in the world of PC building, why not head over to the WePC Community and both the WePC team, and your fellow builders, will be on hand to help!